
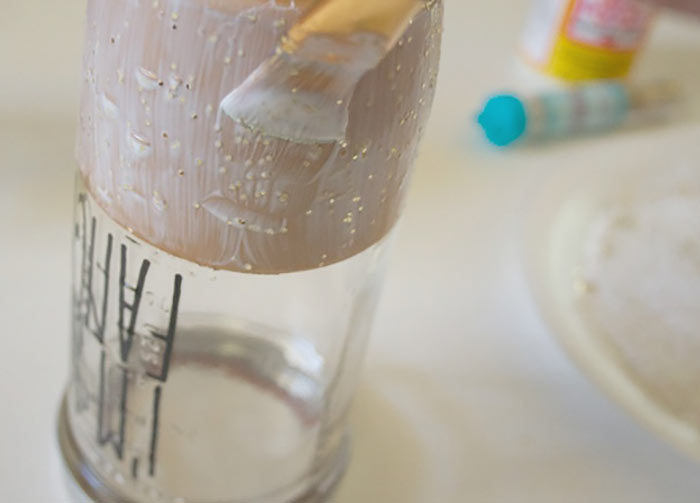
1.Sippin’ Pretty

Say good-bye to your plain old water bottle or insulated jug. This mason-jar-turned-sophisticated tumbler will keep you hydrated in style and have all your friends asking where you bought it.
What You’ll Need:
Large mason jar tumbler
Tape
Spray paint
Glitter
New lid
Vinyl letters
Mod Podge (dishwasher safe or classic matte)
How To Make It:
Clean the surface of the jar, and tape off the area you would like to paint. Spray paint the bottom of the jar and let it dry.
Apply vinyl letters to spell whatever you’d like above the painted section.
Pour enough Mod Podge to cover the spray-painted part of the tumbler onto a plate, and mix the glitter into it. (Or, you can use Extreme Glitter Mod Podge.)
Paint the mixture over the spray paint to seal it, and add glitter.
After it dries, place the lid on the tumbler and pour your first drink!
Source: gavandro.com
2.File Cabinet Makeover
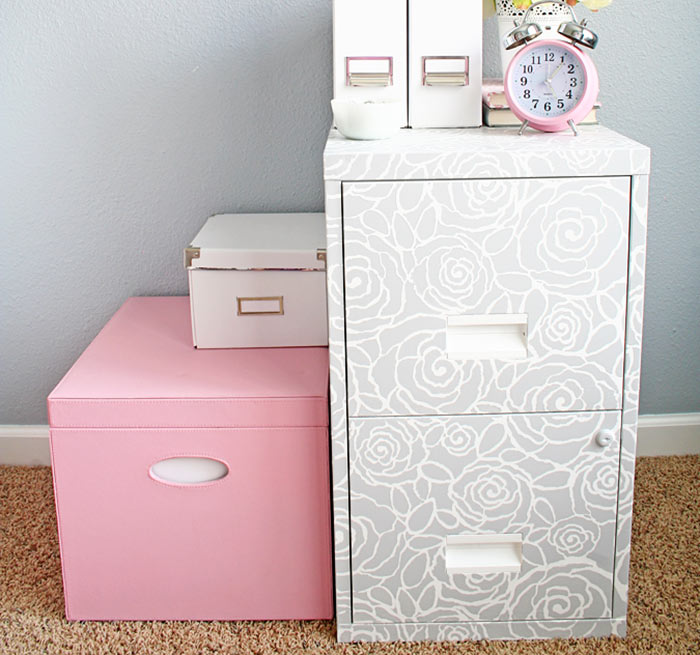
By its very nature, a file cabinet isn’t that attractive. But, it’s a practical and necessary storage option in almost any home or office. So, here’s a way to makeover your file cabinet using paint and a pretty stencil.
What You’ll Need:
File cabinet
Stencil (Check out royaldesignstudio.com. Their Rockin’ Roses Damask Stencil was used in this project.)
Painter’s tape
Latex paint in two colors (One color for the base coat, and one color for the stencil color)
Foam roller
Plastic paint dish
How To Make It:
Paint the file cabinet in your base coat color.
Once it’s completely dry, turn the cabinet over on one of its sides and tape your stencil in the middle of the side facing up.
Start painting over the stencil, moving the stencil out toward the edges until the whole side is painted.
Turn the file cabinet so it is standing upright, and start painting the top.
Once the first side is dry, lay the cabinet on that side and paint the other side.
Lay the cabinet on its back to paint the front. If you don’t want to paint the handles, cover them with painter’s tape.
Let the cabinet dry, and you’re done!
Source: twotwentyone.net
3.Pallet Bookshelf
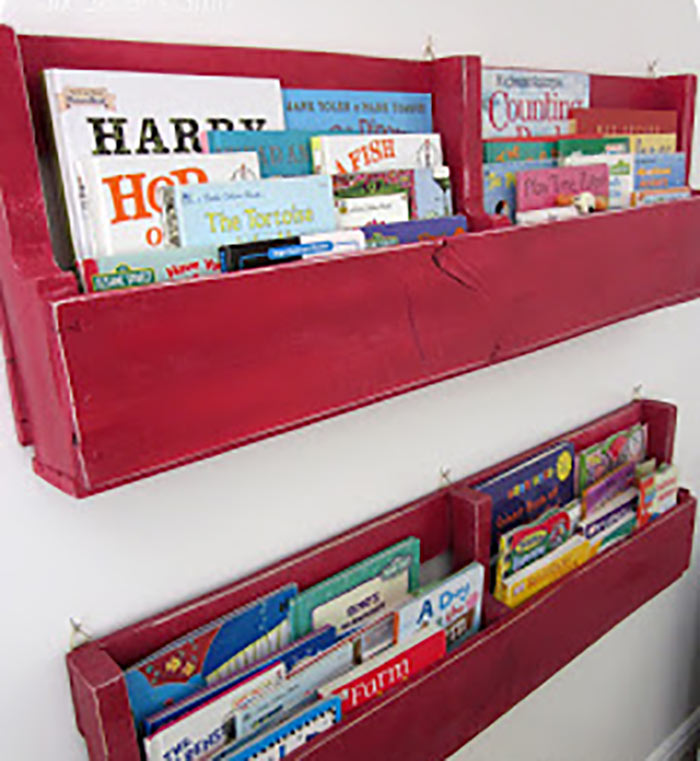
If you’ve spent even a short amount of time scrolling through DIY projects on Pinterest, you’ve probably come across wood pallets and all the different things you can do with them. These pallets are often tossed outside grocery and home improvement stores, so you can snag a few for free (just be sure to ask). But, if you’d rather not take on a project that requires some degree of skill in woodworking, these easy pallet bookshelves are just right for you.
What You’ll Need:
Wooden pallet
Handsaw
Sand paper or electric sander
Kilz Spray Primer or other primer
2 cans spray paint
Hardware to hang the shelves
How To Make It:
Cut the pallet two slats in on each end.
Pry off two of the slats between the cuts and nail them to the bottom of each shelf.
Sand down your shelves and apply the primer.
Spray on two to three coats of paint.
Lightly sand the edges for a distressed look.
Hang the shelves using your hardware.
Source: sixsistersstuff.com
4.Tile Treasures
Display more of your photos by making your own personalized photo coasters. You can use any of your photos, but this tutorial by liliesandloafers.com suggests using your Instagram photos. Basically, you just need to make sure your photos are printed in 4×4-inch squares.
What You’ll Need:
Your Instagram photos (There are several websites you can use to print them.)
4×4-inch tiles (You can find these at any home improvement store.)
Mod Podge (Choose the finish you prefer. For a shiny finish, use Classic Glossy. For a non-shiny or flat appearance, use Classic Matte.)
Paintbrush or foam brush
Circular felt stickers or felt strips
Hot glue gun
Krylon Clear Flat Sealant (Any clear waterproof sealant should work.)
How To Make It:
Start by priming one of the tiles with a layer of Mod Podge using your paintbrush or foam brush.
Press a photo onto the tile, and let it dry for a few minutes.
Apply a coat of Mod Podge over the photo. Let it dry for about 20 minutes before adding up to five coats (drying between each).
Let the tiles dry for a few days before spraying with waterproof sealer.
Allow the sealed tiles to dry for another day or so.
Cut squares of felt, and use a hot glue gun to adhere them to the bottom of the tiles. Or, apply felt stickers to the corners.
Source: liliesandloafers.com
6. Fancy Photos
Forget frames and display your favorite photos on wood instead. Follow this photo transfer tutorial to get your photos onto wood pallets, slabs or planks.
What You’ll Need:
Wood plank
Printed images on copy paper
Foam brush or paintbrush
Sand paper
Krylon Clear Glaze Spray
Mod Podge Photo Transfer Medium or Mod Podge Classic Matte (The Transfer Medium will give your photo a white background, and the Classic Matte will make the background more transparent.)
How To Make It:
Print your photos reversed or in mirror image so your photos don’t come out backward when you transfer them.
Spread Mod Podge over your image, coating it completely.
Place the image, photo side down, on the wood plank, and press the photo gently from the center outward to remove bubbles.
Let the image dry. This may take up to 24 hours.
Wet the image, section by section, with a damp cloth.
Rub gently to remove the paper and expose your transferred image.
Lightly sand the edges for a distressed look.
Seal with the clear spray.
Source: blog.consumercrafts.com
5.DIY Pouf Ottoman
Poufs are not just cute; they’re comfy and cozy, too. They can be a little pricey, so we found a fairly simple tutorial to take you step by step through the process of making your own. Though you don’t need to have amazing sewing skills for this project, we’ve listed the URL at the bottom of this how-to for your reference.
What You’ll Need:
1 1/2 to 2 yards fabric
Upholstery thread
5 to 6 yards piping trim
16-inch zipper
1 pound fiberfill
3 to 4 cubic feet polystyrene beads
How To Make It:
Cut the fabric pieces for the top and bottom of the pouf into 19×19-inch squares.
Cut four side pieces to 19×15 inches.
Sew two of the sidepieces together at their 15-inch sides.
Place the zipper face down into the new seam while pressing the seam open, and pin each side of the zipper.
Sew the zipper on each side, and sew across the bottom of the zipper to create an ending point if it’s longer than the fabric. Use a seam ripper to expose the zipper on the other side.
Sew the other side pieces of the pouf together, leaving half an inch of space at the seams.
Pin the top piece’s sides, with the piping in between, to the pouf.
Pin the side seams slightly below the pointed part of the corners, leaving half an inch of space, and sew the piece to the pouf.
Repeat steps 7 and 8 for the bottom piece (including the piping).
Check your piping, and sew another seam along the piping if it needs to be tightened up. Trim the points off the corners.
Turn your pouf right side out, and fill with polystyrene beads and fiberfill. If you want a firmer pouf, use the beads only. Add a little bit of fiberfill if you want some fluff.
Try to fill the pouf as full as possible. Zip it up, and you’re done!
If you need more details, visit prettyhandygirl.com/diy-pouf-ottoman-tutorial-and-lessons-learned.
Source: addicted2diy.com
7. Master Mod Podge
Decoupage, glue, distress and more with the craft world’s favorite medium: Mod Podge. Though there are different Mod Podge formulas to use for different finishes and surfaces, each one can glue, seal and finish a product. But, it can be a tricky substance to mess with if you don’t know what you’re doing. According to modpodgerocksblog.com, there are several steps you need to take to get the best results from Mod Podge. So here you go—your go-to guide for using Mod Podge correctly:
Apply a base coat of paint to your item, if necessary. If you’re going to use Mod Podge on unfinished wood, a base coat is a good idea.
Choose which Mod Podge formula you should use. With formulas made for fabric, furniture and even glow-in-the-dark projects, there’s one for almost every surface. Find a complete list on modpodgerocksblog.com. For most projects, you should be able to use the Classic formula in either gloss or matte.
Prepare materials. Fabric should be washed, dried, ironed and coated lightly with Fabric Mod Podge before using more Mod Podge to add items to the fabric. Also, you can spray printed images and thin paper with acrylic spray to help prevent Mod Podge from wrinkling them.
Cut items, and use Mod Podge to adhere them from the bottom layer up. Smooth bubbles from the center outward, and let each layer dry for 15 to 20 minutes.
Apply one to two coats of Mod Podge, sanding in between coats, to finish your project. Spray with acrylic sealer if the surface is sticky or tacky.
Source: modpodgerocksblog.com