 Thanks to modern shipping, we can enjoy fresh blooms year-round. However, we can take a practical cue from times past by incorporating fruit and vegetables into arrangements to create drama and texture.
The Tools & Materials
- Floral foam
- Stones or sand
- Piece of foil-covered sheet insulation
- Floral water picks
- Fruit, such as apples, pears or mandarins
- Artichokes
- Water
- Flowers and greenery
- Scarf or runner for table
- Scissors
- Pliers
- Floral cutters
- Tape
- Serrated knife
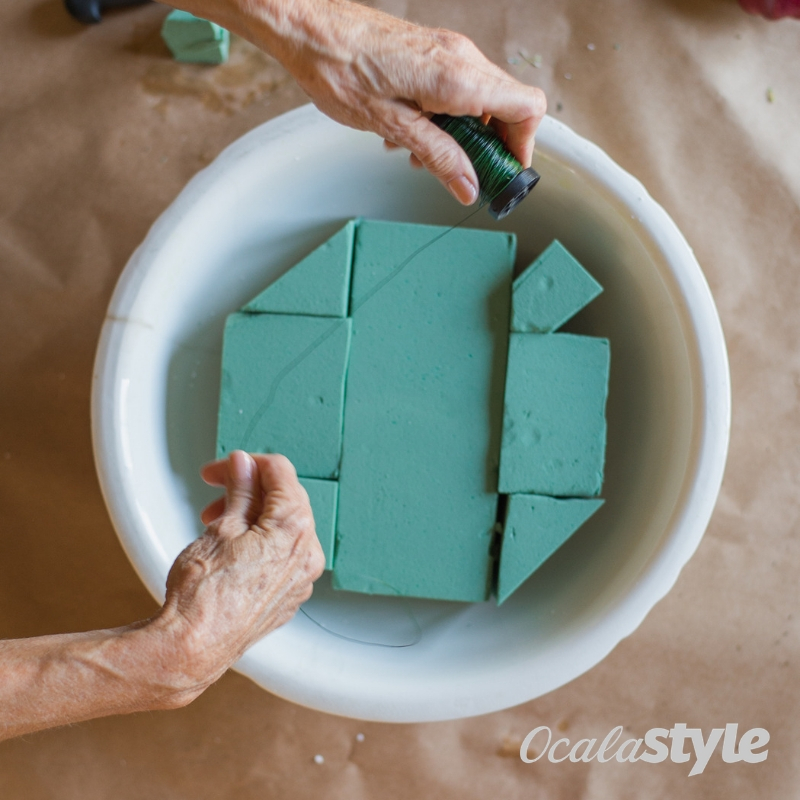
Step 1: The Base
Cut the floral foam to fit the container. Tape or wire it together. You can also use Styrofoam cake forms or blocks. Set to be about 1/2 inch below top of container.
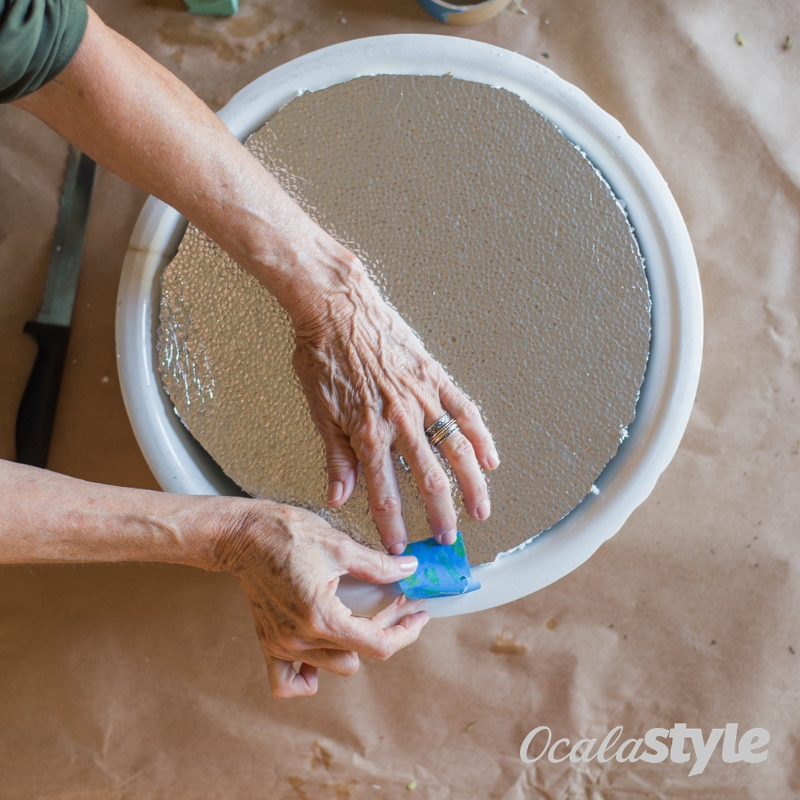
Step 2: The Foundation
Cut foiled insulation to fit inside rim or container. Put over foam with foil side up. The foil helps give strength to punctures for florals
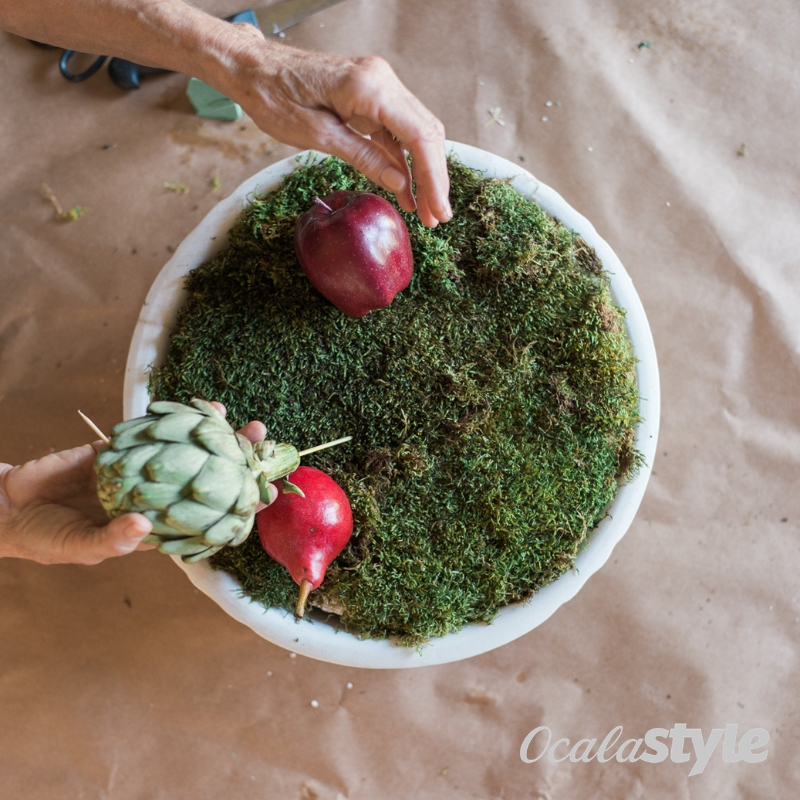
STEP 3: The Moss
Cover top with moss, which comes in sheets or bags. Mist with water to make more manipulative so you can tuck in on edges. Put some floral pins in to hold in place.

STEP 4: The Fruit
Set the fruit pieces in place. These can lay loose until you have your flowers where you want them.
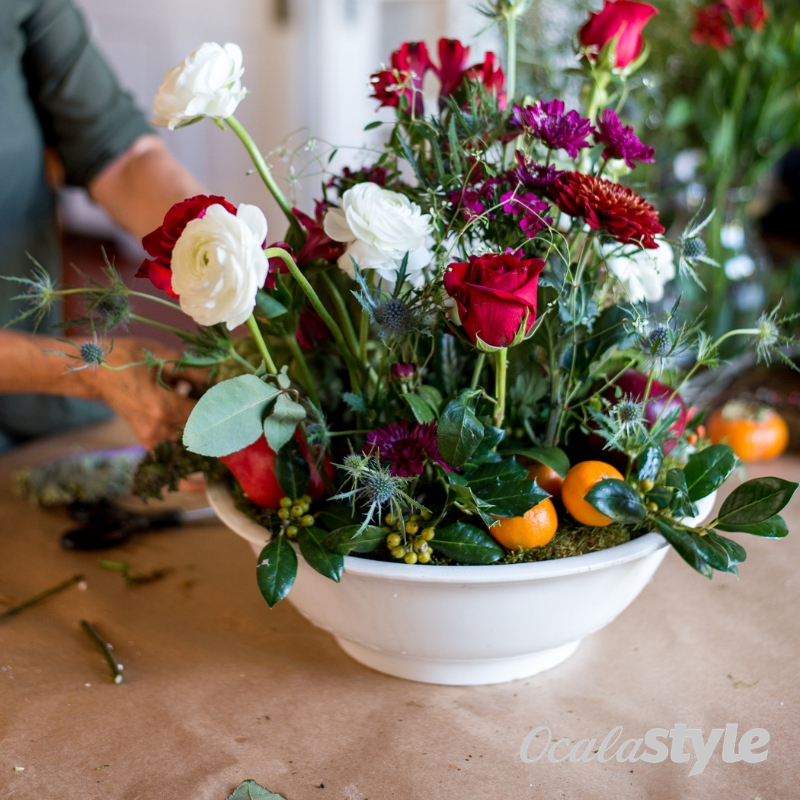
STEP 5: The Flowers & Berries
Start with your tallest flowers first, and put stems in the floral picks with some water and push them into the insultation and into the foam below. These can be cut down later if they end up too tall for the scale of your project when you finish. If you have dried stems in your arrangement, these can be wired to wooden picks and pushed into place. Fill in the lower voids with your leaves, berries and flowers. The flowers can go into floral picks or be laid in, as many smaller flowers will just dry naturally and look great over time. Put skewers into fruit, and set them in place. If something is tipping, use a shorter skewer to help hold it up.
STEP 6: Keep It Fresh
Keep water in the picks so your florals will last longer, and don’t worry about getting the moss wet, as it loves moisture. It won’t mold because any excess water will run off and get soaked up by the floral foam underneath.
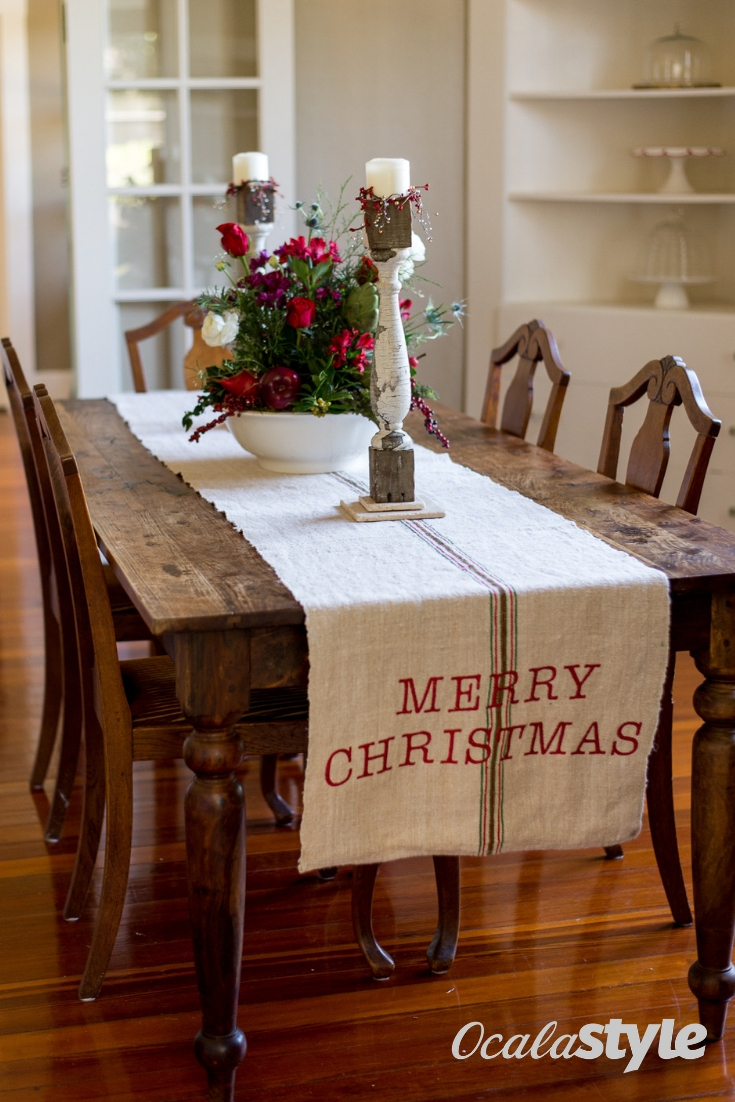
STEP 7: The Runner
If you want your arrangement on a runner, be creative. Use a pashmina or scarf from your closet or a flour, coffee or grain bag for a more rustic look.

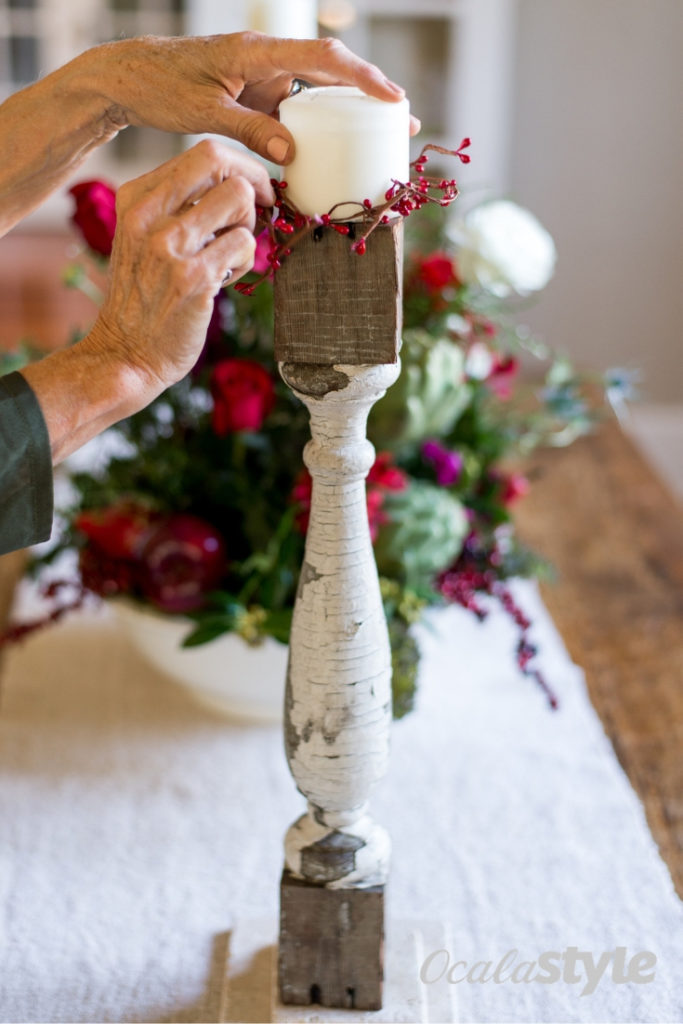
STEP 8: The Candlesticks
For the candlesticks, use two sizes of tumbled stone with felt on bottom, a couple of old balusters and a few berries for garland.